Audrey_Portfolio
This is a website that shows the progress of Audrey's IoT Weather Indicator over the course of three weeks at BSE.
Project maintained by audreylourdes Hosted on GitHub Pages — Theme by mattgraham
IoT Weather Indicator
This project is focused on creating an IoT Weather Indicator. By using an API, I seized information about my local weather to then display it on a OLED screen through an ESP 32.
| Engineer | School | Area of Interest | Grade |
|---|---|---|---|
| Audrey L | Mission San Jose High School | Electrical Engineering | Incoming Junior |
Final Milestone
My third and final milestone was connecting my ultrasonic sensor to my ESP32, functioning correctly, and adding a description about the weather onto the OLED display. An ultrasonic sensor sends a ping that will then listen for an echo that comes back to calculate the distance measured in microseconds. The first step was finding an example code (https://www.tutorialspoint.com/arduino/arduino_ultrasonic_sensor.htm), that would display in the serial monitor the correct distance between the sensor and the nearest object that it was facing. By having this example code, I understood how to deconstruct it to fit the main code I worked on in the past two milestones. So up first, I called the const int function in order for my ESP32 to know which pins the ultrasonic sensor is connected to.
const int pingPin = 27;
const int echoPin = 26;
Then I created an equation to return to me how many inches my sensor is away from the nearest object using a long function that can store the number value information.
long microsecondsToInches(long microseconds) {
   return microseconds / 74 / 2;
}
I created a new void variable called getWeather. My original code that was previously in void loop in my last milestone is now placed in void getWeather. This will make the process of rerunning my code easier by just calling getWeather in the updated void loop.
void getWeather() {
  if ((WiFi.status() == WL_CONNECTED)) { //Check the current connection status

    HTTPClient http;
  http.begin("https://api.openweathermap.org/data/2.5/weather?q=94539,US&appid=5de7158aa8adf3b343e6be6e8feb2a19"); //Specify the URL
    int httpCode = http.GET();

    if (httpCode > 0) { //Check for the returning code

      String payload = http.getString();
      DynamicJsonDocument doc(1024);
      deserializeJson(doc, payload);
      String mainstring = doc["main"];
      DynamicJsonDocument main(1024);
      deserializeJson(main, mainstring);
      double temp = main["temp"];
      temp = (temp - 273.15) * 9 / 5 + 32;
      String weatherarraystring = doc["weather"];
      DynamicJsonDocument weatherarray(1024);
      deserializeJson(weatherarray, weatherarraystring);
      String weatherstring = weatherarray[0];
      DynamicJsonDocument weather(1024);
      deserializeJson(weather, weatherstring);
      String description = weather["main"];
      String icon = weather["icon"];
      Serial.println(httpCode);

      Serial.println(temp);
      display.setTextSize(1);
      display.setTextColor(SSD1306_WHITE);
      display.setCursor(50, 0);
      display.println(temp);
      display.display();

      Serial.println(description);
      display.setTextSize(1);
      display.setTextColor(SSD1306_WHITE);
      display.setCursor(50, 30);
      display.println(description);
      display.display();
    }

    else {
      Serial.println("Error on HTTP request");
    }

    http.end(); //Free the resources
  }
}
Later on, I used the long function again, but in this case it was so it stored the numbers of the distance into a variable. Below the first line of this long function is another long function. However, this long function establishes the variables for the duration of the ping.
long getDistance() {
   long duration, inches, cm;
This ping is set off by a high pulse or microseconds of either two or more seconds. However, before initiating a high pulse, it is essential to give a short, low pulse to guarantee a smooth high pulse. And that is why I wrote some digitalWrite functions, beginning at low then high and writing digitalMicroseconds functions that go from 2 to 10.
   digitalWrite(pingPin, LOW);
   delayMicroseconds(2);
   digitalWrite(pingPin, HIGH);
   delayMicroseconds(10);
   digitalWrite(pingPin, LOW);
I then declared the variable of duration to pulseIn, which has the role of reading a pulse. This variable will then be included in the inches variable to calculate the proper distance within microseconds.
 duration = pulseIn(echoPin, HIGH);
   inches = microsecondsToInches(duration);
By using Serial.print, the correct inches will display in the serial monitor in the unit “in” every 1/10 of a second by using a return function.
   Serial.print(inches);
   Serial.print("in");
   Serial.println();
   delay(100);
   return inches;
I then included in the void loop an if statement that will only run if there is an object within 7 inches to the sensor. If so, the screen will clear with the display.clear function and upload a “loading screen” with the display.print function. However, the display.set functions are there to determine how the loading screen will appear on the OLED display. The loading screen is there for both looks and for the user to know when the updated weather is displayed. However, the loading screen appears for only a limited amount of time with the delay function. After this function, the screen clears again, and getWeather is rerun to have new and current data of my local weather.
void loop() {
if (getDistance() <= 7) {
  display.clearDisplay();
  Serial.println("Loading...");
  display.setTextSize(1);
  display.setTextColor(SSD1306_WHITE);
  display.setCursor(35, 30);
  display.println("Loading...");
  display.display();
  delay(700);
  display.clearDisplay();
  getWeather();
Second Milestone
My second milestone was displaying the temperature of my city on the OLED screen. An OLED screen is a piece of technology that utilizes LEDs, where organic molecules produce light. The model that I am using has four pins and communicates with microcontrollers that use an I2C communication protocol. To continue off of milestone #1, I had to connect the OLED screen to the ESP32. To join the OLED screen to the ESP32, I need to solder in the header pins into the OLED Screen. By using a solder machine, I was able to place these pins into the correct holes permanently. I then connected female to female wires to the correct ports of the OLED screen and ESP32.
| (OLED display)→(ESP32) |
|---|
| GND → GND |
| VCC → 3V3 |
| SCL → D22 |
| SDA → D21 |

Now that all the correct pins are connected, I needed to install the required libraries. I then downloaded Adafruit SSD1306 and Adafruit GFX, which will control the OLED display through the ESP32. These libraries allowed me to display both words and images onto the OLED screen. I then began to add to my code from my last milestone.
#include <SPI.h>
#include <SPI.h>
#include <ArduinoJson.h>
#include <WiFi.h>
#include <HTTPClient.h>
#include <Adafruit_GFX.h>
#include <Adafruit_SSD1306.h>
I made sure to include the libraries that will be used throughout this code in the very beginning.
Adafruit_SSD1306 display(128, 64, &Wire, 4);
The line of code that says the library’s name before the function display is used to call which dimensions of this display that I would be using. In this case, I want to have the ability to use the entire screen. So by having the dimensions of (128, 64), this grants me that access. Below the deserialization code, you can see code that is meant to print out the temperature onto the display.
Serial.println(temp);
display.setTextSize(1);
display.setTextColor(SSD1306_WHITE);
display.setCursor(0, 0);
display.println(temp);
display.display();
The first line of this section is dedicated to printing the temperature data to the serial port. The following two lines are there to set the color and size of what will be displayed. The following line then sets the location of where the data will be printed. Finally, the display function then calls for the temperature to be displayed on the screen. Compared to the last milestone, this milestone I encountered more difficult challenges. First up is that my OLED display was not functioning correctly and appeared to be broken. Another challenge was that I could not find a working library for my first OLED screen. But after being sent a another one as a replacement for my broken one, all the original libraries that I was supposed to download began to work for me.
First Milestone
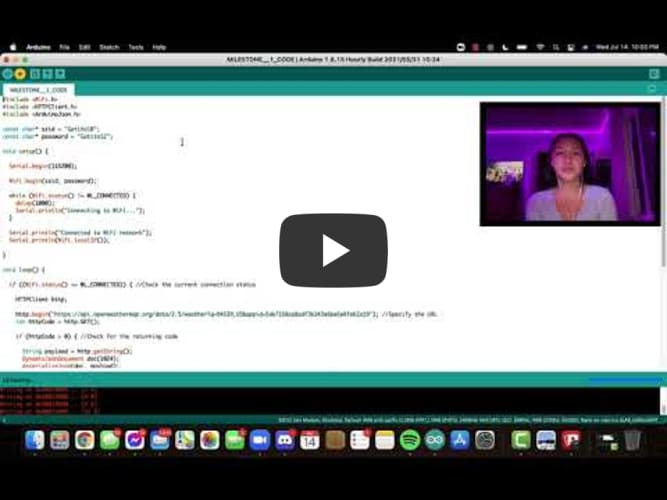
My first milestone was creating a functioning code that enabled my ESP32 to connect to Wi-Fi. An ESP32 is a powerful Wi-Fi/Bluetooth-enabled SoC with a massive GPIO count. By granting this access, the ESP32 was capable of using APIs, specifically ones that contained information about my local weather, which then allows me to now manage this data and use it however I see fit for this project. Beginning this first milestone was making sure my laptop had all the necessary software and applications, such as Arduino and CP210x VCP Driver. Arduino’s software is where all my written code throughout this project will be placed for my ESP32 to run. The CP210x VCP Driver is what allows me to download the Arduino IDE and have my code upload to the ESP32. The first piece of code I created was dedicated to connecting my ESP32 to the Arduino application Tutorial #1. After doing so, I then wrote another code to program my ESP32 to connect to my house’s Wi-Fi Tutorial #2. Using a website called Open Weather, I created an API password and used an API call that required my zip code and city name. This API allows me to use my local weather information in my code. I then added onto my previous code that involved connecting my ESP32 to Wi-Fi. This code used a GET request to use this API and display the information I want about the weather Tutorial #3. Now that I have the necessary code, my job is to deserialize it to only display the information I want and in the suitable unit Tutorial #4. At last, my code now displays the weather accurately in Fahrenheit. A challenge I faced is writing unfimilar code, and to overcome this challenge I did enough research to better understand how to write suitable code for this script.


